

В Урок 10.1, вы узнали, что Соотношение риска и прибыли (R:R) это ваш контракт с рынком. В Урок 10.2, вы научились количественно оценивать неопределенность рынка, используя Волатильность а также Стандартное отклонение.
Теперь мы объединяем эти концепции, чтобы создать самый важный элемент инфраструктуры для любой торговли: Стоп-лосс.
Стоп-лосс — это больше, чем просто инструмент экономии денег. Это спасательный круг, отделяющий профессиональную и дисциплинированную торговлю от эмоциональных спекуляций. Здесь вы признаете: «Моя торговая идея в корне неверна».
Основная миссия Stop-Loss: предотвращение «шумовых остановок»
Ошибка номер один, которую совершают трейдеры, заключается в том, что они устанавливают стоп-лосс, основываясь на том, что им комфортно терять в долларах, а не на том, где рынок опровергает торговую идею. Это создает «шумовую остановку».
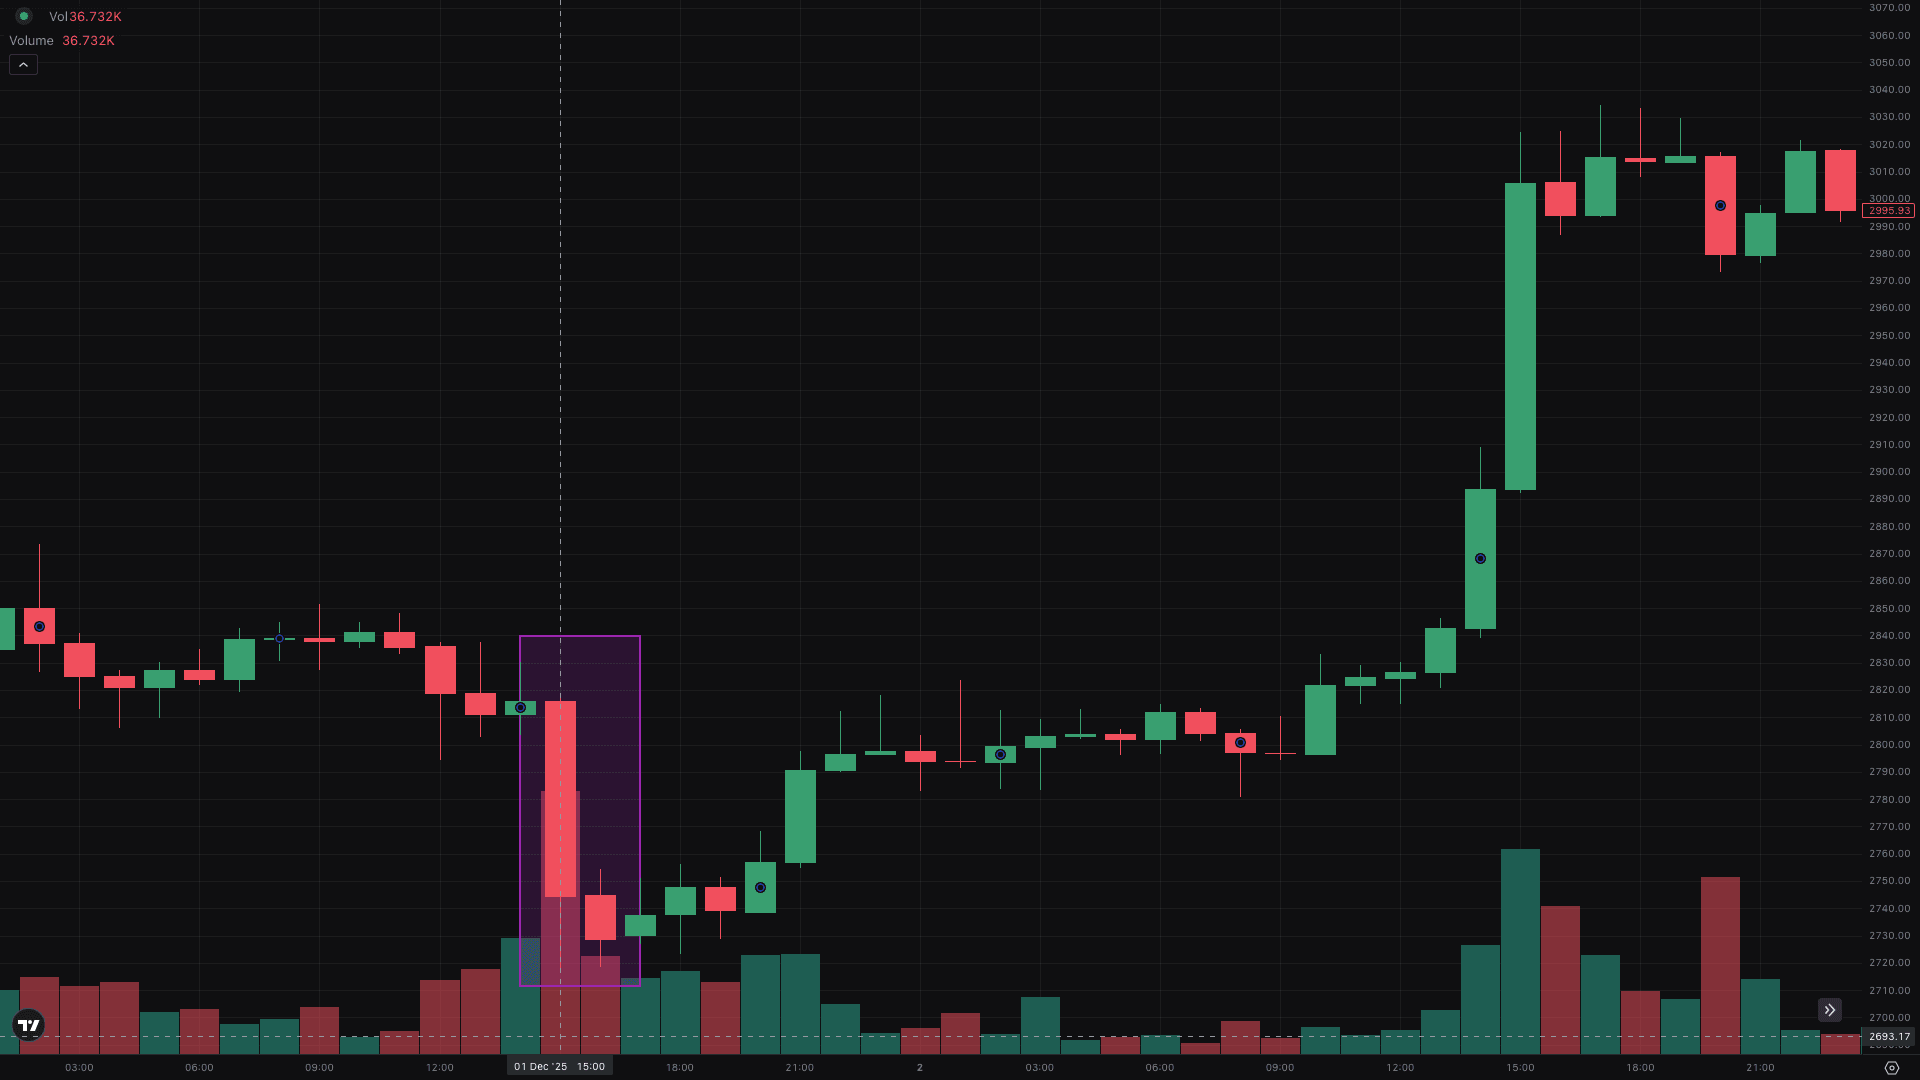
Что такое рыночный шум? Шум — это случайное краткосрочное колебание цены, которое не имеет долгосрочного значения. Если курс биткоина постоянно растет на 3% в день (высокая волатильность), то стоп-лосс в размере 2% — это не что иное, как случайная цель, которую рынок должен достичь, прежде чем продолжить движение в намеченном направлении.
Принцип стратегической остановки
Стоп-лосс должен быть установлен в той ценовой точке, которая в случае ее достижения докажет, что ваш первоначальный анализ был ошибочным.
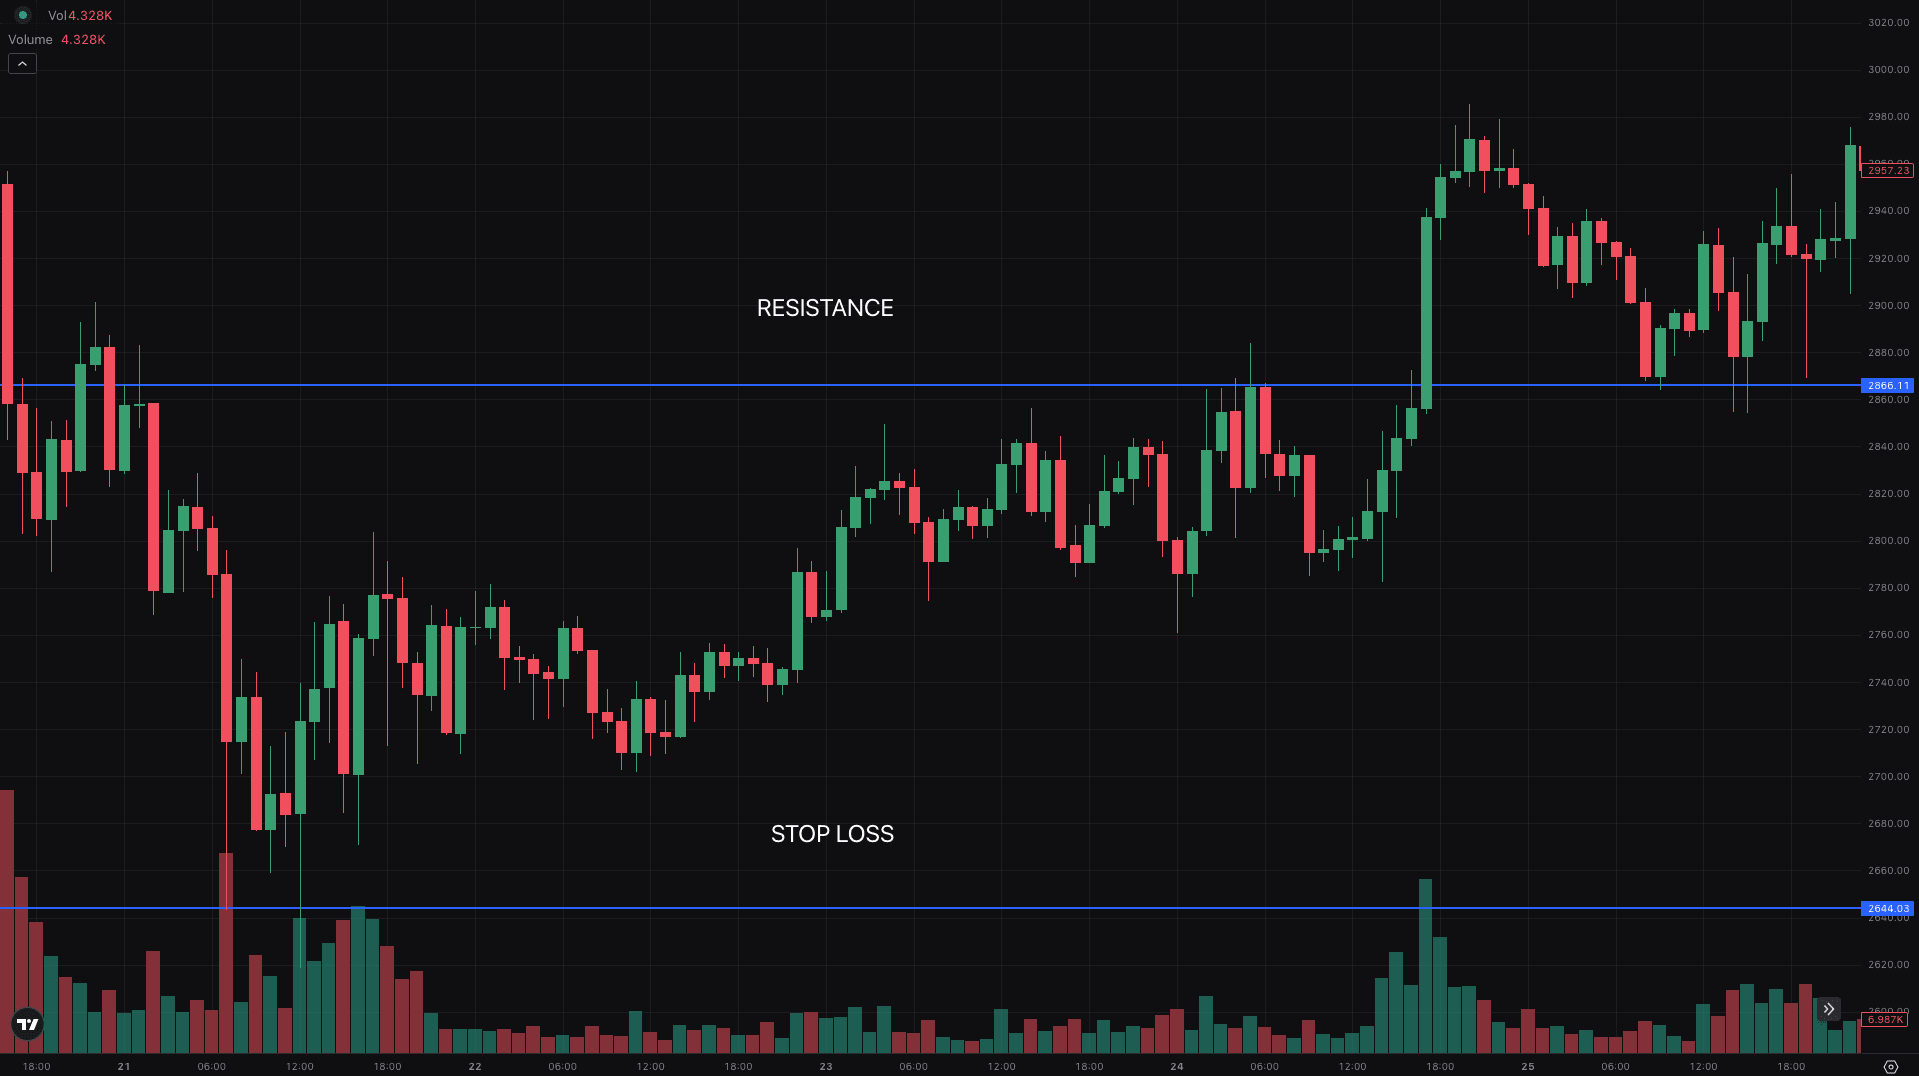
- Если у вас длинная дорога (покупка): Ваш стоп-лосс должен быть установлен ниже последнее значительное уровень технической поддержкиили за пределами границы статистического отклонения.
- Если у вас короткая позиция (продажа): Ваш стоп-лосс должен быть установлен выше последний значительный уровень технического сопротивления.
Ваша цель: Размещать стоп там, где сделка с наибольшей вероятностью выдержит краткосрочный шум и будет запущена только в случае нарушения основной рыночной структуры.
Три основных типа стоп-лоссов
Не все остановки одинаковы. Тип, который вы используете, зависит от вашей торговой стратегии и ожидаемого движения рынка.
1. Рыночные остановки (The Hard Stop)
A Рыночная остановка (или Hard Stop) — самый распространенный тип. Вы устанавливаете определенную фиксированную цену, и когда актив достигает этой цены, платформа немедленно исполняет ордер на продажу.
- Подходит для: Дневная торговля, стратегии с фиксированной целью и активы с высокой ликвидностью (например, BTC/ETH).
- Осторожно: На нестабильных или низколиквидных рынках рыночный стоп может пострадать от проскальзываниеЭто означает, что ваш заказ может быть исполнен по более низкой цене, чем предполагалось, что может превысить расчетный риск.
2. Трейлинг-стопы (средство защиты прибыли)
A Трейлинг-стоп динамичен. Вместо фиксированной цены она движется вверх (для длинной позиции) или вниз (для короткой позиции), поскольку сделка движется в вашу пользу, фиксируя прибыль и позволяя расти.
- Подходит для: Рынки с сильным трендом, на которых вы хотите набрать обороты, сохраняя при этом достигнутые результаты.
- Пример: Вы покупаете по 100 долларов и устанавливаете трейлинг-стоп на 5 долларов. Если цена вырастет до 120 долларов, ваш стоп перейдет к 115 долларам. Если цена упадет до 115 долларов, сделка закроется, гарантируя вам прибыль в 15 долларов.
3. Остановки, зависящие от времени (остановка альтернативных издержек)
Это передовая техника, основанная на альтернативная стоимость. Вы выходите из сделки не потому, что цена достигла вашего стопа, а потому, что цена не менялась в течение определенного периода времени.
- Подходит для: Стратегии прорыва или торговля с ограниченным диапазоном.
- Обоснование: Если вы вступаете в сделку, ожидая изменения в течение 4 часов, а затем через 4 часа цена останется неизменной, вы выйдете из сделки. Рынок не опроверг вашу идею, но он доказал, что эта возможность еще не готова, и вы можете высвободить свой капитал для более выгодных условий.
Расчет: сочетание волатильности, индикаторов и RR:
Стратегическое расстояние остановки рассчитывается в три простых шага, которые объединяют все ваши уроки риска:
Шаг 1. Использование технических индикаторов для определения инвалидности
Определите логическую ценовую точку, в которой настройка нарушена. Это часто делается с помощью:
- Поддержка и сопротивление (S/R): Размещение стопа чуть ниже основной поддержки или выше основного сопротивления.
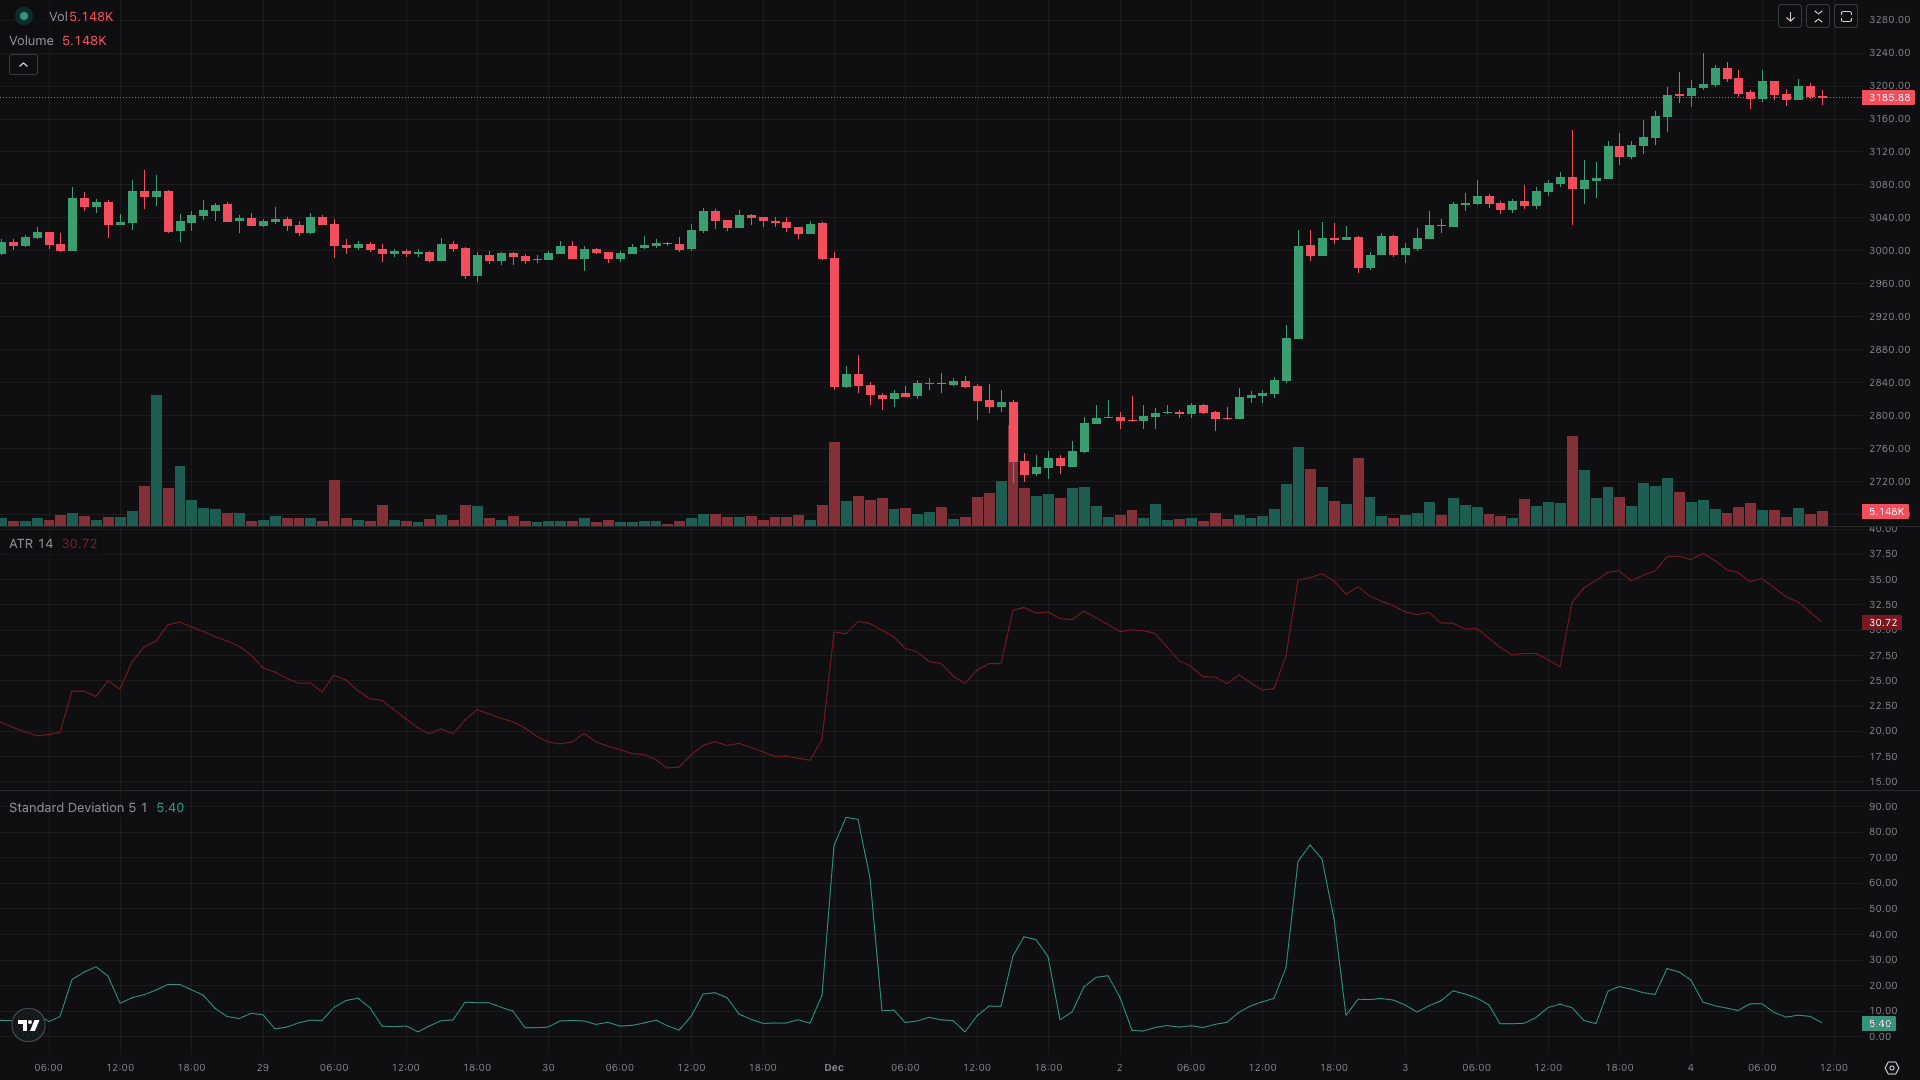
- Средний истинный диапазон (ATR): Этот индикатор, связанный с волатильностью, рассчитывает средний расстояние между высокими и низкими ценами за определенный период. Для предотвращения шума часто эффективно устанавливать стоп на сумму от 1,5 до 2,0 долларов, превышающую текущую цену ATR.
- Стандартное отклонение Как описано в уроке 10.2, установка стопа за пределами этого диапазона дает сделке 95% статистических шансов выжить в нормальном рыночном движении.
Шаг 2. Убедитесь, что контракт R:R выполнен
Как только вы получите свой Расстояние остановки (например, убыток в размере 4%), вы должны обеспечить свой Цель по прибыли как минимум вдвое больше расстояния (минимум 1:2 R:R).
- Если расчетная стоп-дистанция составляет 5$\ %$, ваша целевая прибыль должна составлять не менее 10%.
- Если ваша базовая тормозная дистанция требует потери на 10%, а техническая цель — только 12% (1:1,2 R:R), вы должен пропустить сделку. Математика не подтверждает риск.
Шаг 3. Расчет размера позиции (последний шаг)
Последним шагом является использование Правило 1% (будет рассмотрено в уроке 10.4) с использованием только что рассчитанного расстояния.
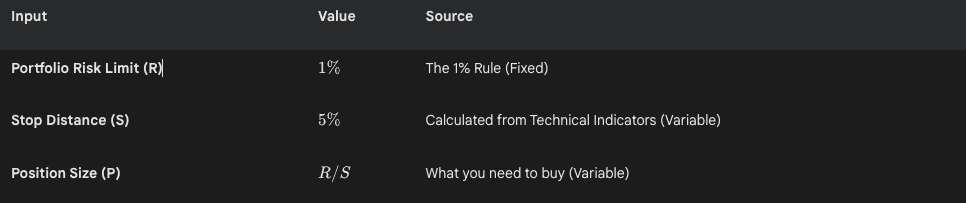
В этом примере, чтобы рискнуть всего 1% своего портфеля при 5-процентном стопе, вы можете вложить в сделку только 20% своего совокупного капитала (1%/5% = 20%). Стоп диктует размер.
Ключевые практические выводы
- Не шумите, а не рискуйте: Ваш стоп-лосс должен быть стратегический маркер Это доказывает ошибочность вашего торгового тезиса, а не случайный процент.
- Используйте индикаторы: Объективно закрепите свой тормозной путь с помощью таких инструментов, как ATR или же Стандартное отклонение чтобы не вдаваться в рыночный шум.
- Применяйте R:R: Расчетное расстояние остановки должен соответствуют вашим минимальным требованиям 1:2 R:R. Если это не так, не торгуйте.
- Преимущество Walbi: Терминал Walbi позволяет предварительно настроить все три переменные (риск, R:R и тип стоп-лосса) непосредственно при вводе ордера, что требует соблюдения этой дисциплины еще до совершения сделки.
На следующем уроке мы конкретизируем этот последний шаг, погрузившись в Правило 1%: основы сохранения капитала и применение математики определения размера позиции.


